Exterior Trim on a House: Types, Window and Door Trim, Materials and Installation
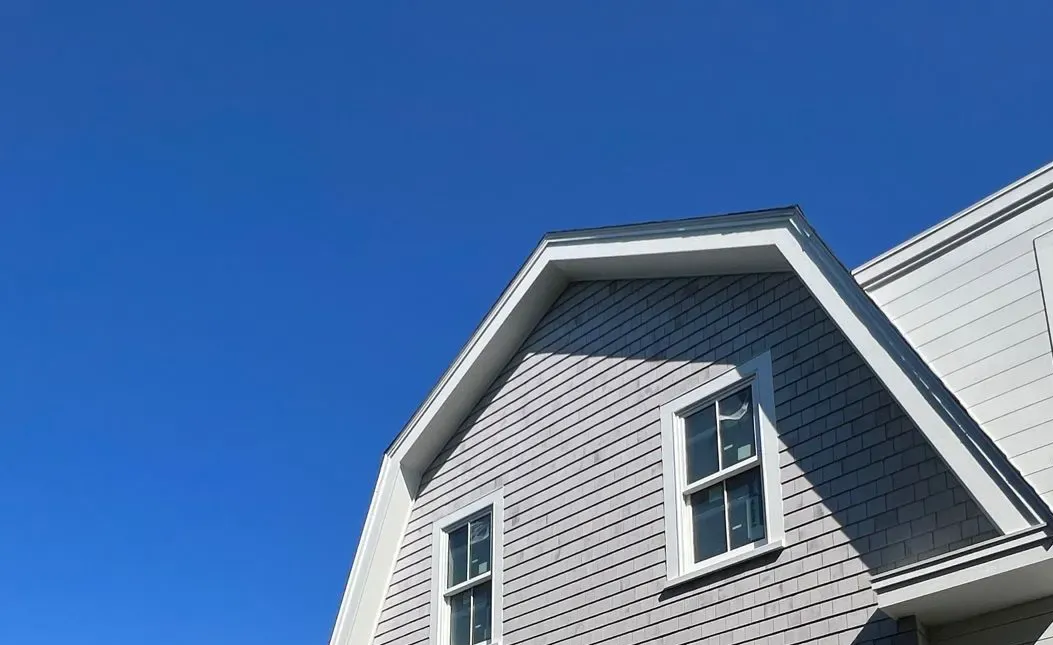
Updated October 2026Exterior trim is the trim on the outside of a house: the boards and moldings that frame the roofline, the corners, the windows and doors, and the base of the wall. It covers the joints where siding stops and gives the house its style. Detailed right, it sheds water instead of soaking it up.
What Is Exterior Trim?
Siding covers the open field of a wall; exterior trim finishes its edges and openings. That frame has two jobs.
The first is appearance. Trim sets the proportions of a facade, adds shadow lines and signals the style of a house. A wide, flat casing suits a Craftsman house. A narrower casing with a small cap above the window suits a more traditional one. Because trim outlines the windows, doors and corners, new trim changes curb appeal quickly.
The second job is protection. Trim covers the cut ends of siding, the gaps around window and door frames and the seams where different materials meet. It works together with the flashing and the weather-resistive barrier behind it, never instead of them.
The name of a trim piece and its material are separate questions. A corner board can be wood, PVC, fiber cement or a composite such as ACRE.
Interior vs exterior trim. Interior trim, such as baseboard, crown molding and indoor door casing, lives in a dry, steady room. Exterior trim takes rain, sun, snow and daily temperature swings, so the material and the installation decide how long it lasts.
Types of Exterior Trim, from Roofline to Foundation
Knowing the names of the trim pieces makes it easier to describe a repair, read a quote or order the right board.
| Trim piece | Where it goes | What it does |
|---|---|---|
| Rake board | Along the sloped edges of a gable | Finishes the gable edge; “gable trim” usually means the rake |
| Fascia board | Along the horizontal roof edge at the eaves | Caps the rafter ends; gutters usually hang on it |
| Frieze board | At the top of the wall, just under the eave | Closes the joint where the wall meets the roof overhang |
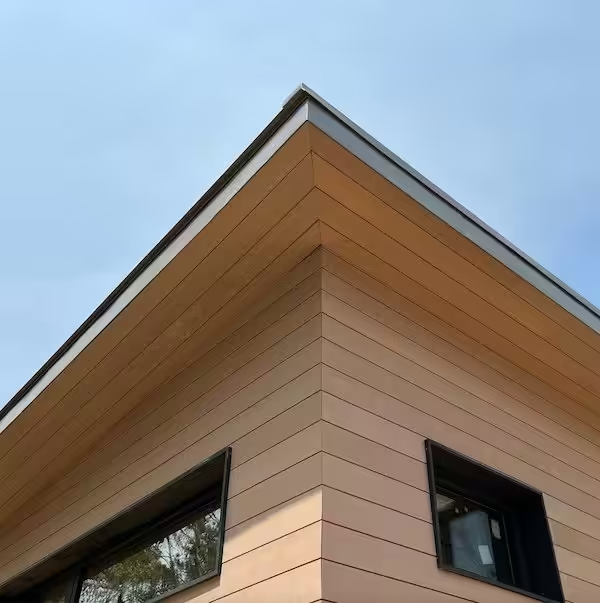
| Corner boards | At outside and inside corners of the walls | Cover the siding ends where two walls meet |
| Window casing | Around each window: head and side casings, often with a sill and apron below | Frames the window and covers the gap between the window and the siding |
| Door casing or brick mould | Around exterior doors | Frames the door; brick mould is the thicker molded casing many exterior doors ship with |
| Drip cap | Above head casings and other horizontal trim | A strip of flashing, often a Z-flashing over flat trim, that throws water out past the trim face |
| Band board (belly band) | A horizontal board between floors or where siding changes | Breaks up a tall wall and covers the transition |
| Water table or skirt board | At the bottom of the wall, above the foundation | Finishes the base of the siding and sheds water away from it |
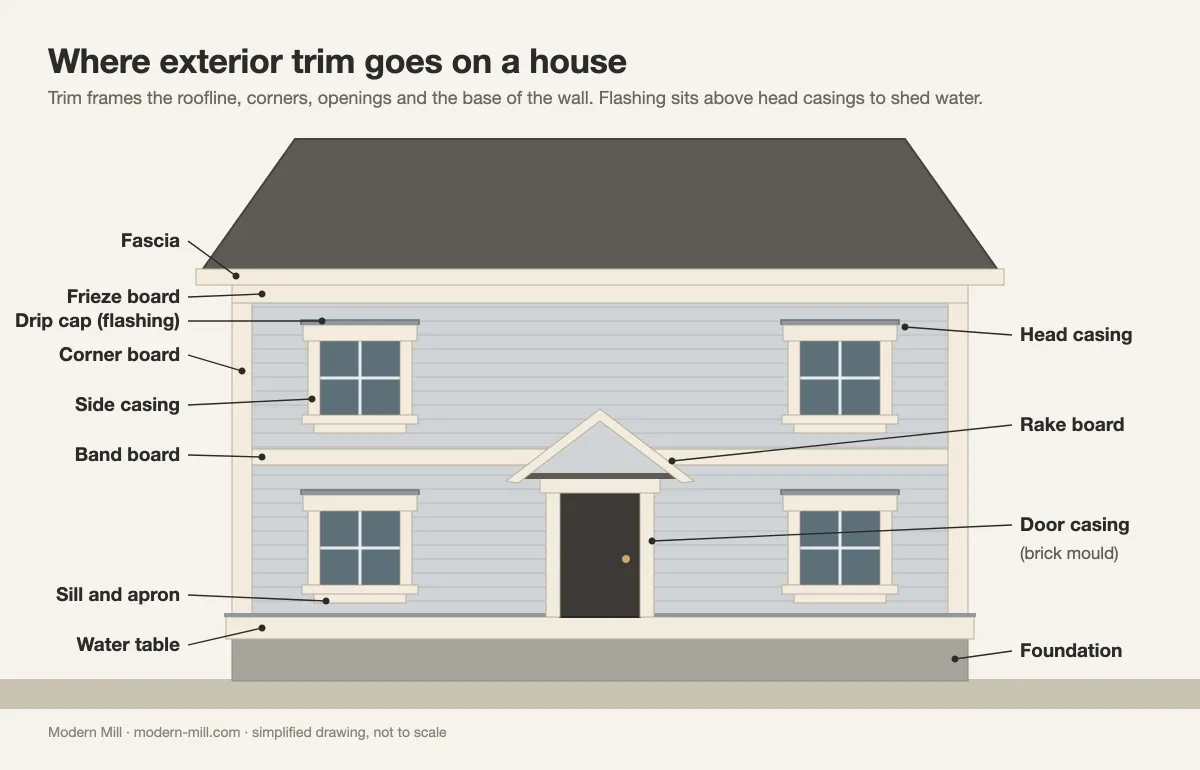
The pieces near the roof take water from above. Fascia sits right behind the gutter, so an overflowing or leaking gutter soaks it first. The frieze board sits under the overhang, so it stays drier than the trim below it.
The pieces near the ground take water from below. Water tables, skirt boards and the bottoms of corner boards sit closest to splashback, snow and wet soil, so they are where wood trim tends to rot first.
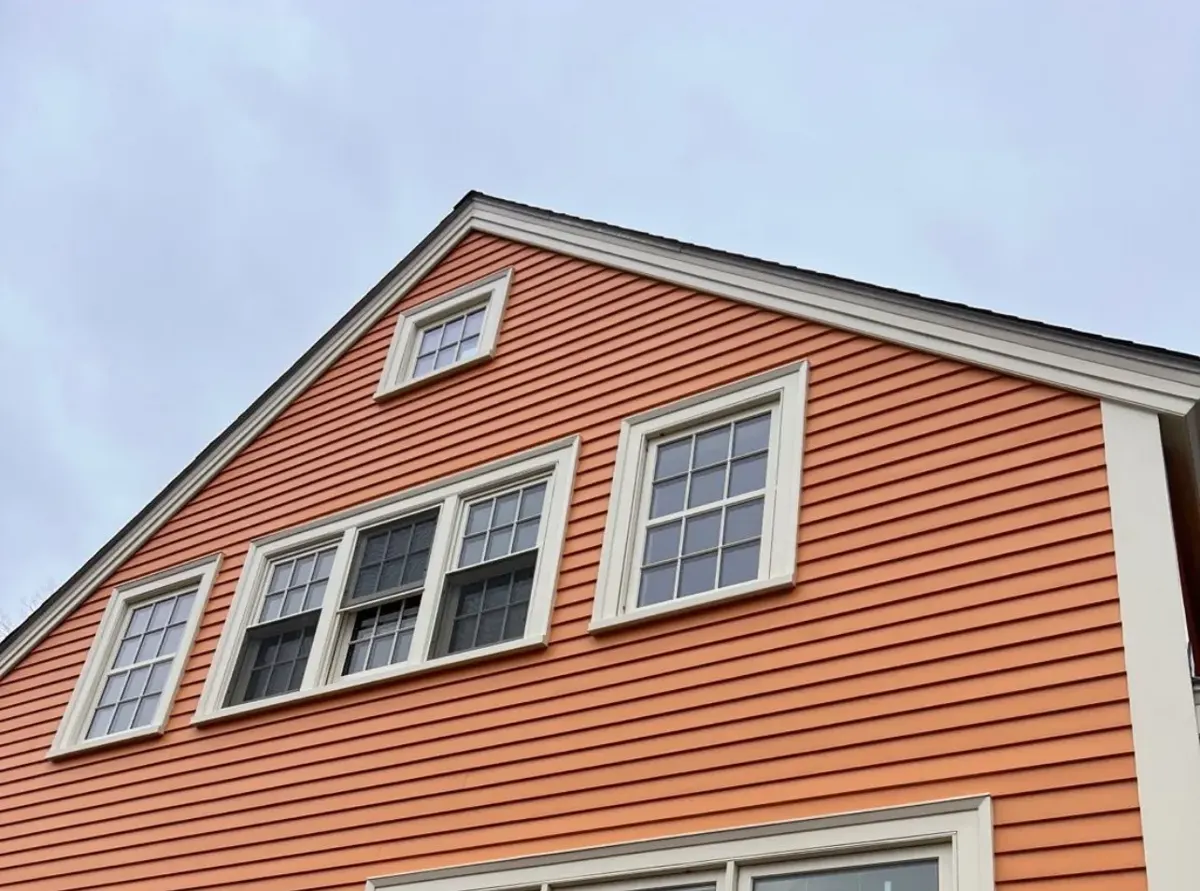
Decorative trim builds on these basics. A frieze or a window head can take a crown detail, such as ACRE Flat Crown Moulding, and still needs a way to shed water.
Color does as much as the profile. Trim painted to contrast with the siding, such as white trim on a dark wall or dark trim on light siding, outlines every opening and corner, while trim painted close to the siding color recedes. On plastic-based trim, check the maker’s color rules before you pick a dark shade; ACRE’s are covered in the installation section below.
Exterior Window Trim: Parts, Profiles and Install Order
The trim around an outside window is called exterior window casing: a head casing across the top and two side casings (also called legs). Below them sits a sill, which is often part of the window unit itself, and sometimes an applied apron under it.

The usual choice for exterior window trim is between flat casing and brick mould. Flat casing uses plain boards, often with a thicker head that runs a little past the legs for a shadow line, which suits Craftsman, farmhouse and modern homes. Brick mould is a molded profile that often comes attached to door units and some windows and gives a traditional look with no extra trim work.
Flat casing is usually cut from 1×4 or 1×6 trim stock, which measures 3-1/2 or 5-1/2 inches wide. Thickness follows the same nominal sizing: ACRE 1-inch trim is 3/4 inch thick and 5/4 trim is 15/16 inch, and the thicker stock gives a casing more depth against the siding.
ACRE Trim Boards come in actual widths from 2-1/2 to 15-1/4 inches, so a wide head or a tall apron can come from a single board.
The order of work matters more than the profile, because exterior window trim sits over a joint where water often gets into a wall. This sequence fits a new window or an exposed opening. If you are only replacing casing on a window that stays in place, inspect the existing flashing first and have any damaged flashing repaired:
- Flash the window first. The International Residential Code requires flashing at exterior window and door openings (IRC R703.4 and R703.4.1, 2024 edition), usually installed to the window maker’s instructions. Where those don’t cover the detail, the flashing or barrier maker’s instructions apply, and where no instructions exist, a sloped or sealed sill pan plus flashing or protection at the head and sides. The code also accepts other approved methods, such as a registered design professional’s design.
- Check the sill. Whether it is part of the window or an applied trim sill, it should slope so water runs out and away from the wall.
- Install the side casings, then the head casing across the top.
- Add a drip cap over the head casing, with its back leg tucked under the weather-resistive barrier and siding above, so water running down the wall drips past the trim face.
- Leave the drainage gaps open. Keep the small gap between the siding and the drip cap, and the bottom edges that let water drain, free of caulk, while lapping and sealing the flashing itself as its instructions require.
Without a drip cap, water running down the wall collects on the top edge of the head casing, which is a common place for wood casings to start rotting.
Exterior Door Trim and Brick Mould
Exterior doors have a sill built into the door frame, so the trim around them is the side casings and a head casing. They frame the opening and cover the gap between the door frame and the siding.
Many prehung exterior doors arrive with brick mould already attached. Despite the name, it isn’t only for brick houses. It is a thicker molded casing that sits proud of the siding on any wall, and the door maker’s instructions set how it is fastened and sealed. The opening needs the same flashing as a window: the IRC sections above apply to door openings too, including the sill pan and head and side protection when the door maker gives no flashing details.

If you want more presence than brick mould, a door surround can be built up from flat trim:
- Wide flat casings with a thicker head, the Craftsman approach
- Pilasters on each side with a head or pediment across the top
- A head casing with a small cap or crown molding on top
Door casing often fails at the bottom first, though a head without a drip cap or flashing can fail too. The ends of the side casings sit just above the threshold, the stoop or a concrete step, where rain splashes and water pools. End grain that sits in that water wicks it up, and the bottom few inches rot first. Keep the casing ends clear of the concrete (the clearance rules for wood are in the water section below) and seal or paint every cut end the material’s instructions call for. The head casing needs the same drip cap and head flashing as a window.
Exterior Trim Materials Compared
The best material for exterior trim depends on where the board goes and how much upkeep you want.
| Material | Strengths | Watch for | Upkeep |
|---|---|---|---|
| Wood (cedar, pine, primed finger-jointed pine) | Easy to cut, mill and match; takes paint well; the traditional look | Rots where water sits at end grain and joints; painted wood needs every face primed | Repainting and caulk checks |
| Engineered wood | Wood look in long, consistent boards | Field cuts must be sealed; follow the maker’s clearances | Repainting |
| Fiber cement | Won’t rot; holds paint well; stable once installed | Heavy; cutting makes silica dust, so it needs the right blade and dust control | Repainting |
| Vinyl | Made to match vinyl siding; no painting | Fewer profiles than milled trim boards | Low |
| Cellular PVC | Won’t rot; smooth face; easy to rout and shape | Moves with temperature, so joints need planning; many products limit dark paint colors | Low; paint is optional |
| Aluminum trim coil | Covers existing trim quickly | Can hide rot if the wood underneath isn’t fixed first | Low |
| ACRE (rice-hull composite) | Resists water, rot, weather, splintering and pests; suitable for ground and water contact; less expansion and contraction than competitive PVC; first finish takes approved paint or stain colors with no primer; no end sealing; cuts like wood; can be thermoformed into curves | Still moves with temperature, so it follows the published gap table; finish before installing, and coatings must follow the color rules | Low; wash at least every 6 to 12 months |
Wood is still the benchmark for looks and workability. Its weak point is water. The National Park Service’s long-standing Preservation Brief 10 names moisture penetration as one of the main causes of wood deterioration and explains that keeping moisture out is a primary reason for painting wood. For new wood trim that will be painted, prime all faces and every cut end before it goes up, following the primer and wood maker’s instructions.
“Composite trim” isn’t one material. The label covers engineered wood, wood-plastic blends and rice-hull composites like ACRE, and each one has its own gap, fastening and coating rules. Our comparison of PVC trim vs composite trim puts those synthetic options side by side.
ACRE is made from upcycled rice hulls and PVC and is 100% tree-free. The ACRE Trim Fact Sheet lists it as resistant to water, rot, weather, splintering and pests, and it cuts, routs, fastens and sands with standard woodworking tools and needs no pre-drilling.
Like wood, rice hulls vary slightly in color from one board to the next. Left unfinished, ACRE weathers in the sun like other exterior materials, so the coating guide recommends a water-based protective clear finish to resist dirt, staining and UV fading. The Lifetime Limited Warranty covers defects from the manufacturing process, including rotting or splintering caused by it.

Upkeep is simple: the ACRE care guide calls for washing ACRE down with water at least every 6 to 12 months and cleaning it with a gentle all-purpose cleaner and a natural fiber brush.
You don’t have to use one material everywhere. Put the most water-tolerant trim where water hits hardest, such as sills, door casing bottoms, water tables and anything near the ground, and match the look higher up. For the case for composite, see the benefits of composite trim.
Keep Water Out First: Flashing, Caulk and Clearances
Rotted trim is usually a water problem before it is a material problem. Replace a soft board without fixing where the water comes from, and the new board meets the same fate.
Flash above trim. Besides window and door openings, the IRC requires flashing “continuously above all projecting wood trim” (R703.4). On band boards and water tables, that is the same drip cap used over a window head.
Caulk seals, it doesn’t flash. Use it on vertical joints where trim meets siding or a window frame; the ACRE trim guide recommends exterior caulk at vertical clearances only. Leave the gaps meant to let water out open, such as the bottom edge of horizontal trim. Where a window or door maker gives its own sealing steps, follow them for that unit.
Keep wood off wet surfaces. IRC R304.1 (2024 edition) requires naturally durable or preservative-treated wood for exterior wood siding, sheathing and framing within 6 inches of the ground or within 2 inches above concrete steps, porch slabs and patios. The same logic applies to wood trim: keep it clear of soil, mulch and slabs, or use a material made for those spots. Even then, Modern Mill recommends keeping ACRE clear of landscaping and standing water.
Fix the source. Clean and repair gutters before replacing fascia, add kick-out flashing where a roof edge meets a wall, and stop sprinklers and splashback from hitting the base of the wall.
Patch or replace? A small soft spot can be cut out and filled with a two-part epoxy or spliced with a new section. When rot runs through the board, follows a long length or keeps coming back at the same end, replace the whole piece. While it is off, check the sheathing and framing behind it.
Installing ACRE Trim: The Rules That Keep It Performing
ACRE contains PVC, so it expands and contracts with temperature, though less than competitive PVC, per our ACRE Trim fact sheet. The rules below come from Modern Mill’s current ACRE Trim Installation Requirements for Trim Boards (2026.08), on the resources page, and they apply to Trim Boards. Following the published guide is a condition of the warranty. The same requirements also cover Rabbeted Trim, which laps over siding ends to hide movement: leave 1/4 inch of clearance between the siding and the rabbeted trim, and fasten 2 inches from the joint. Some older Modern Mill documents, such as a 2025 Rabbeted Trim guide and a 2024 three-part spec, still give older numbers (for example, 1-1/2 inches of penetration); the 2026 requirements are the current ones.
Gap board ends by the temperature on install day:
| Temperature at install | Gap at board ends |
|---|---|
| Below 50°F | 1/8 inch |
| 50°F to 70°F | 1/16 inch |
| Above 70°F | No gap |
The guide says ambient temperature, direct sunlight and the color of the finish all affect movement and must be considered when setting the gap. On long runs, it calls for allowing 1/8 inch per 18 feet of trim. Short pieces, such as the casing around a window, can and should be built with tight joints. Leave 1/4 inch of clearance where trim meets windows, doors and other wall obstructions.
Fasten to the schedule. Use at least 8d x 2-1/2 inch ring-shank nails (0.099 inch diameter or larger) or #8 x 2-1/2 inch screws; screws are highly recommended. Pick a length that still reaches at least 1-1/4 inches into solid framing through the trim and sheathing. Check the arithmetic: 5/4 trim (15/16 inch) over 7/16-inch OSB plus 1-1/4 inches of penetration comes to 2-5/8 inches, longer than the 2-1/2 inch minimum, so thick trim over that sheathing needs a longer fastener. The wall needs at least 7/16-inch OSB or 1/2-inch plywood sheathing.
| Trim board width | Fasteners per span |
|---|---|
| Up to 3 inches | 1 |
| 4 to 8 inches | 2 |
| 10 and 16 inches | 4 |
| Nominal 12 inches | Not in the guide’s span table; ask Modern Mill |
The guide sets spacing at no more than 16 inches on center when fasteners go into solid framing and no more than 12 inches when they go through sheathing only. The ACRE Jobsite Checklist gives the same split (16 inches into solid framing, 12 inches if not hitting studs) and sets a 12-inch maximum for vertical installations, such as side casings and corner boards. Fasteners that reach framing need at least 1-1/4 inches of penetration; where they go through sheathing only, keep them 12 inches apart or closer.
Joints get their own counts: two fasteners on each side of a scarf or miter joint for 4- to 6-inch boards, three for 8- and 10-inch boards and four for 12-inch boards. Keep fasteners at least 3/4 inch from the board edge and 1-1/4 to 2 inches from the end of a glued miter, and install boards right after cutting.
Do not use brads, finish or trim-head nails or screws, or staples to hang trim, and use fasteners rated for exterior use; the guide notes that coastal jobs may require stainless steel. For face fastening with hidden heads, the Cortex screw and plug system is available for trim at least 5/8 inch thick.
Joint the runs, glue only the miters. Use scarf or shiplap joints on long runs rather than butt joints. Glue mitered corners with a high-quality exterior adhesive for PVC and pin-tack the miter while the glue cures. The ACRE Product Catalogue adds: never use wood glue. Leave other trim joints unglued so they can move.
Finish to the coating rules. Modern Mill’s Field Coating Requirements call for water-based coatings (100% acrylic latex for exterior paints) with a light reflectance value (LRV) of 55 or greater, or a color from the approved color lists. Below 55, or if you’re unsure, contact Modern Mill for approval. The limit exists so the trim doesn’t absorb excess heat and distort. Never have a color custom-tinted at a paint store, test a coating on a sample piece first, and contact Modern Mill for testing and approval before applying multiple coats. We recommend finishing boards before installation, and staining after installation is not recommended, since it can leave an uneven appearance. To repaint over a different color later, the guide calls for a white primer first. ACRE trim is also available factory-finished in seven Signature stain colors, including ACRE Black and Walnut.
Watch reflected heat. The trim guide warns that sunlight reflected off Low-E window glass can overheat ACRE surfaces enough to melt, sag, warp or discolor the material, so check for strong reflections onto trim before installation and talk to Modern Mill about any you find.
Shape it when you need to. ACRE can be thermoformed into curves and folded corners. The guide recommends heat blankets or a vacuum press, gives a core temperature of about 250°F and recommends testing a small piece first. Modern Mill assumes no liability for harm or damage related to thermoforming.
What Exterior Trim Replacement Costs
HomeAdvisor’s exterior trim cost guide (updated June 17, 2026) puts a project to replace exterior window trim at $917 to $3,516 (average $2,105) and repairing window trim at $100 to $300 per window. For basic installation priced by the foot, Homewyse estimated a national average starting at $6.29 to $11.10 per linear foot in May 2026 for 8-inch pre-primed wood fascia under favorable site conditions. Window and door casing can price differently, and removal, repairs and finishing come on top.
What moves a quote most:
- Rot behind the trim. Damaged sheathing, jambs or rafter tails turn a trim job into a carpentry job.
- Height and access. Fascia and rake work on a second story usually means ladders or staging.
- Finishing. HomeAdvisor puts painting trim at $1 to $3 per linear foot.
- Profile. Custom or built-up profiles take more material and more labor than flat stock.
In a house built before 1978, check for lead paint before old trim comes off. Under the EPA’s Renovation, Repair and Painting Rule, contractors paid to disturb painted surfaces in pre-1978 homes must be certified. Minor repair and maintenance that disturbs 20 square feet or less of exterior paint is exempt, but window replacement and demolition of painted surfaces are always covered, and practices EPA lists as prohibited stay prohibited at any size. Whoever does the work, prying and sanding old painted trim calls for lead-safe practices.
When you compare quotes, ask whether the installer has worked with the trim material you picked and follows its published installation guide. For ACRE, Modern Mill offers an installation course for installers.
ACRE pricing is set by distributors and dealers, so ask your local dealer for a quote on the profiles and lengths you need.
Frequently Asked Questions
What’s the Difference between Door Casing and Door Trim?
Door trim is the general term for any trim around a door. Door casing is the specific set of boards, the sides and the head, that frames the opening and covers the gap between the door frame and the wall. On exterior doors, that casing is often a molded brick mould profile that comes attached to a prehung door.
Can You Replace Exterior Trim Without Replacing the Window or Door?
Yes. Casing and brick mould can come off and be replaced with the window or door left in place; window sills and door sills are often part of the unit itself, so check before you plan to swap them. While the old trim is off, inspect the frame, sheathing and flashing, since rot often hides behind it.
What Trim Color Should You Avoid on Composite or PVC Trim?
Avoid dark shades the trim maker hasn’t approved. Dark paint absorbs more sun, which adds heat and movement to plastic-based trim. On ACRE trim, stay with the LRV 55 rule or Modern Mill’s approved color lists described above.
Before You Order Trim
Start with the water. Fix gutters, flashing and clearances first, then choose the toughest material for the spots that stay wet longest.
If you want trim that cuts like wood, takes approved paint and stain colors and needs no end sealing, look at ACRE trim, then order ACRE samples to check the profile and finish against your siding before you commit.

Ready to Experience the
Difference?
Ask for ACRE at your local lumber yard or order samples to see for yourself why builders are making the switch.